Documentation
Roles and permissions for Home Assistant
This service is an access layer for Home Assistant (HASS), the open-source home automation platform which already supports more than 1000 devices.
Integrity now offers a simple way to manage user roles and permissions on Home Assistant. It allows you to share any device to your neighbour, friend, or temporary visitor.
An admin might also want to restrict access to certain devices for security or usability reasons. Children might not be allowed to tinker with the core heating system, while an Airbnb host may not be allowed to open the door before a certain time. The admin might also just want to simplify her dashboard and not expose every connected object in the house.
Our Integrity component now makes all these key features available in the most secure and convenient way. Our decentralized platform is built on Brickchain, the open identity protocol.
Installation Guide
Prerequisite: To use Integrity and invite users, make sure that you have installed the Home Assistant software and configured at least one connected device. You also need to have created a realm on integrity.app and installed the mobile app.
Note: At the moment, you can only host the Home Assistant service on our Integrity platform, and manage it from our admin interface. However, we are planning to release the source code for the realm software and the Home Assistant controller on our Github page, so that you can run it yourself. Please drop us an email if you are interested in this possibility: hello@integrity.app
To setup your domain, please:
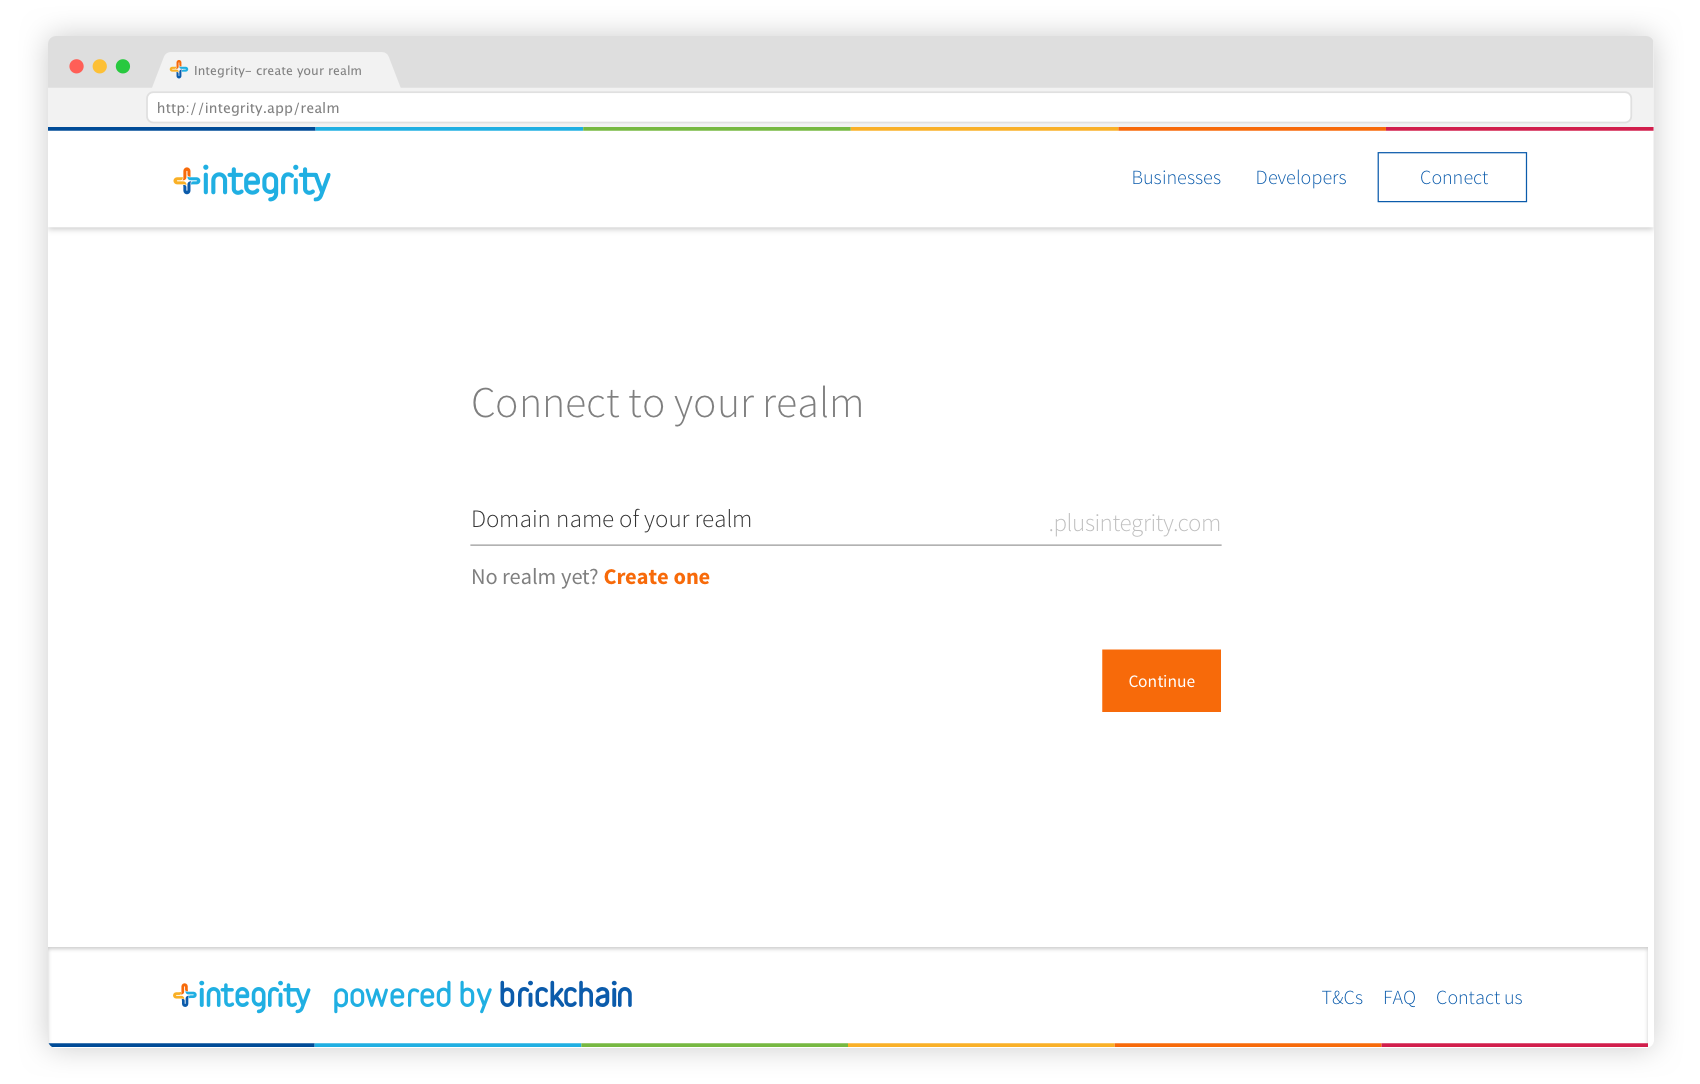
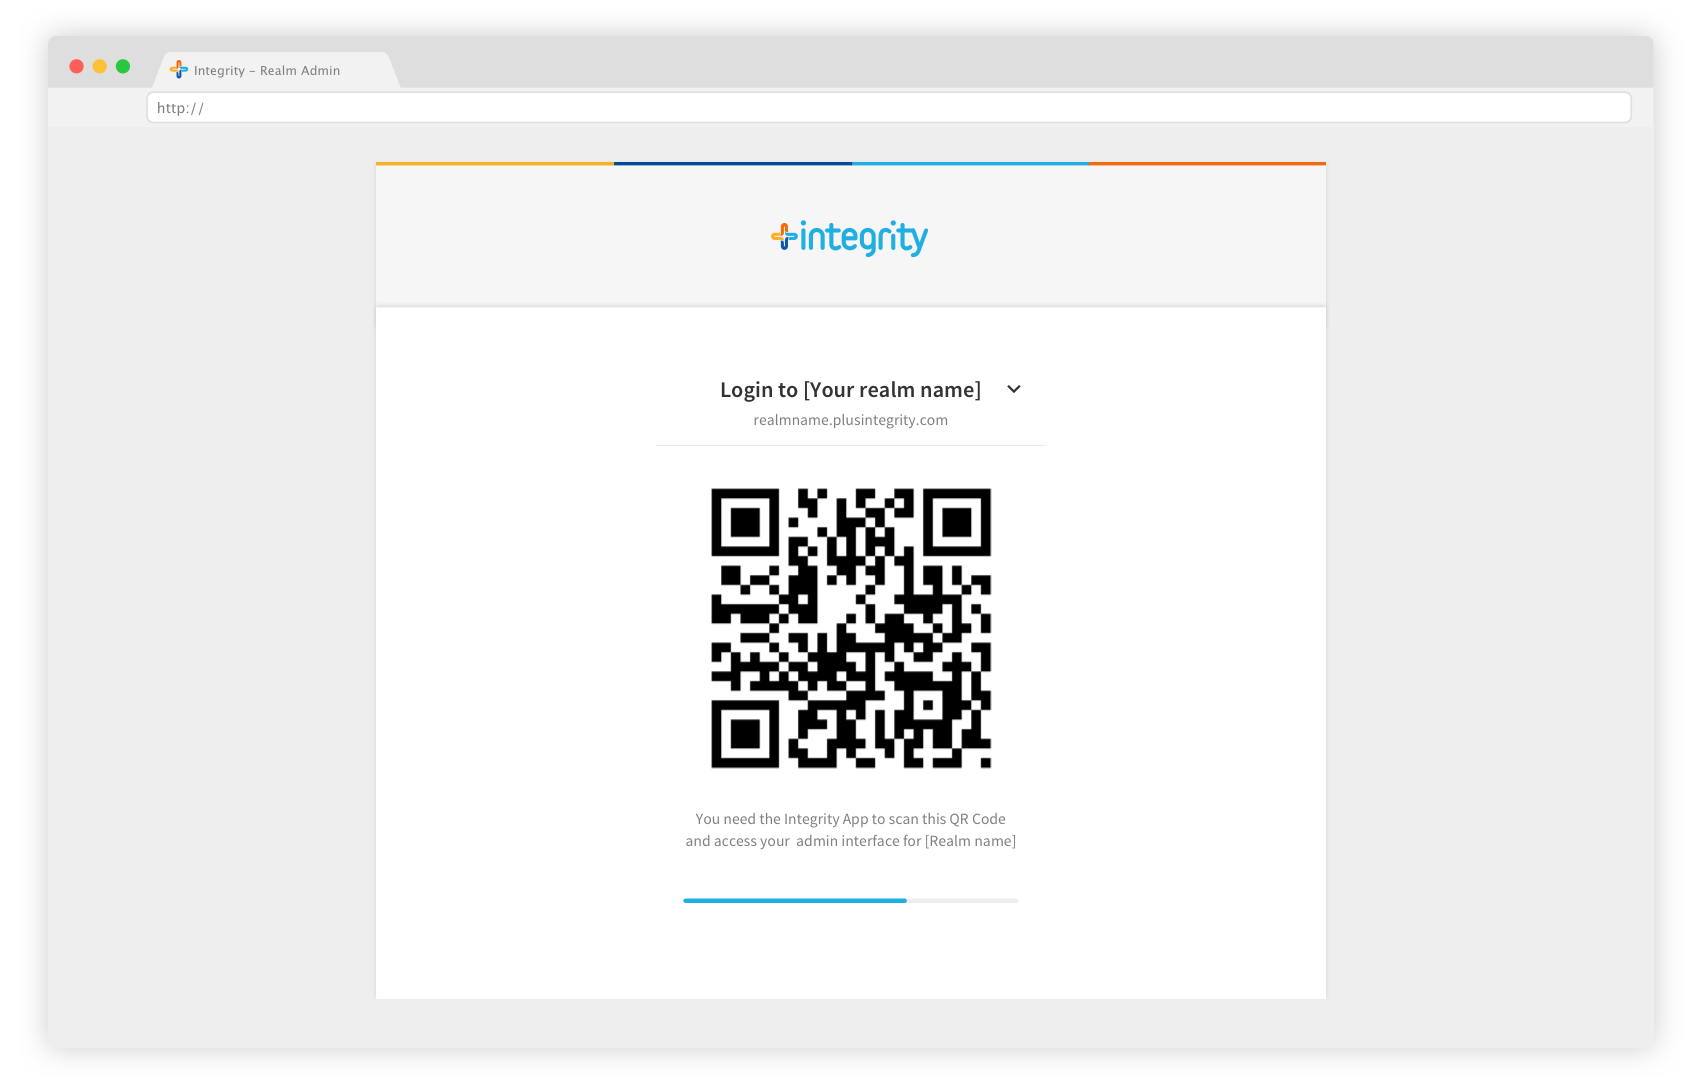
1- Connect to your realm admin by using the Integrity website: enter the domain name of your realm, and then scan the QR code with your Integrity App. Note that you can also connect to your realm admin straight from the mobile application.
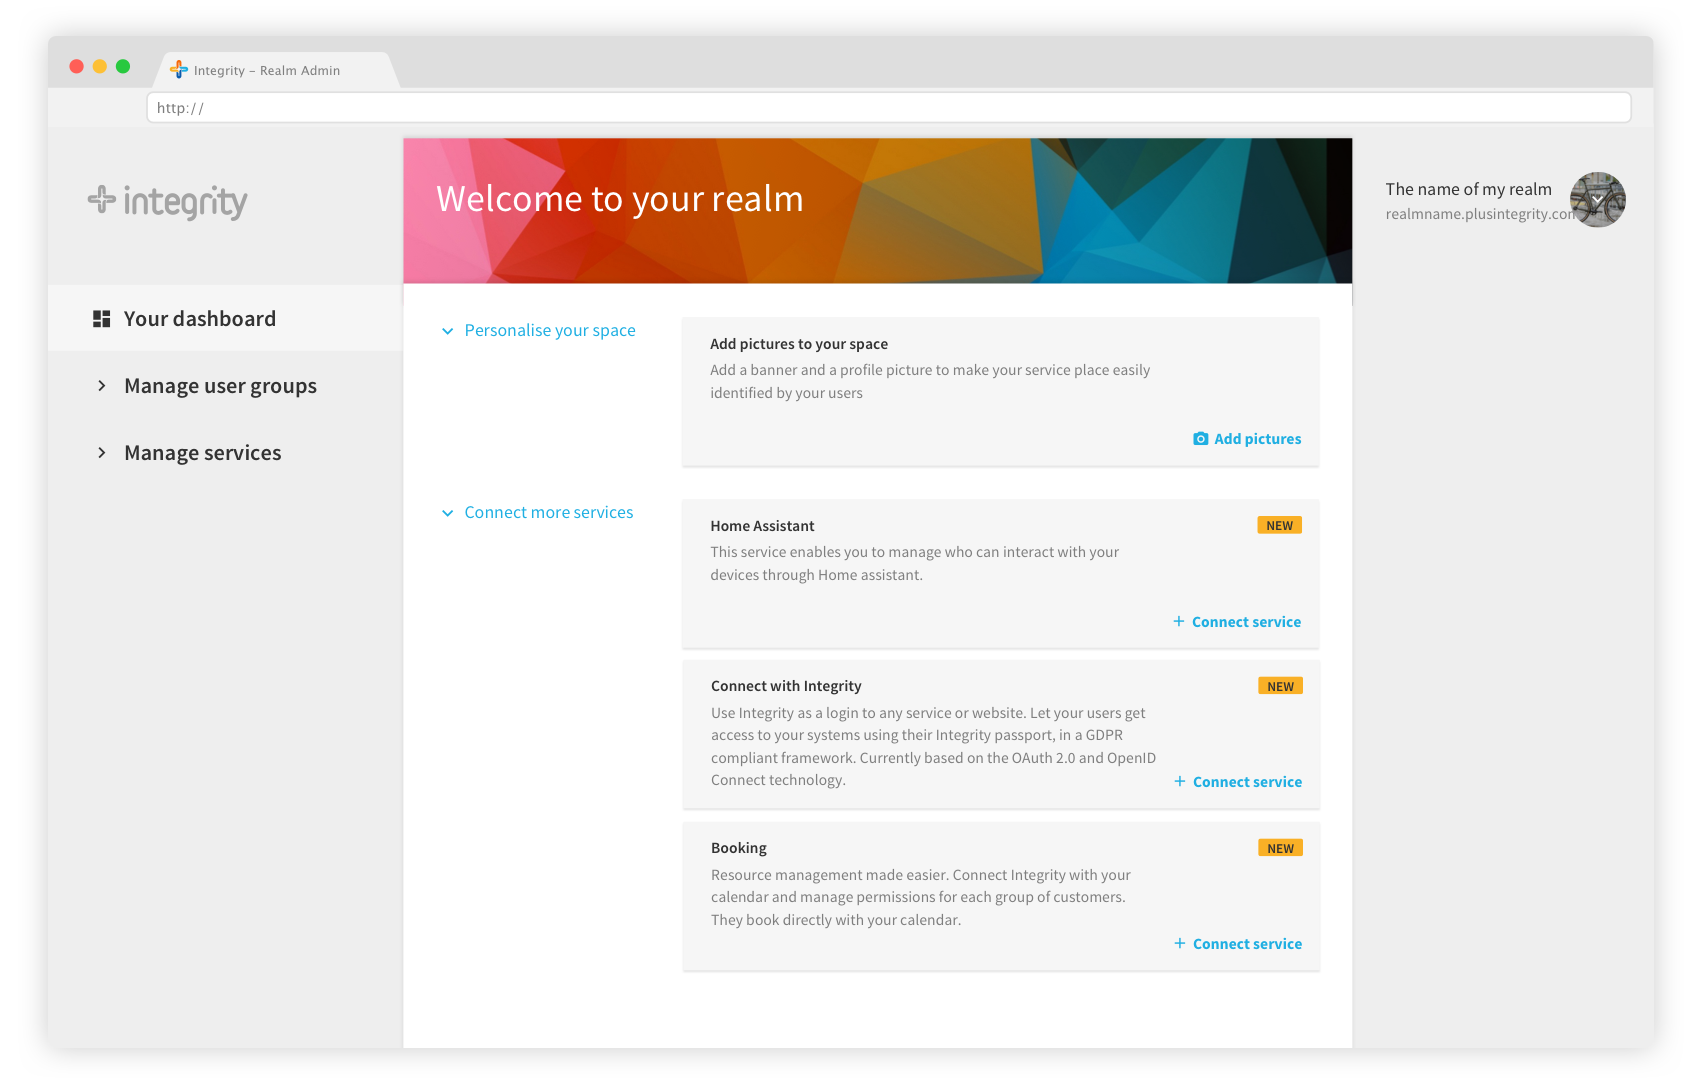
2- On the realm admin dashboard, you can find different services to install and configure. Choose the Home Assistant service and click “Connect service”.
Click “Connect services” in the list of available services. Select a name for your service, and click “Next”.
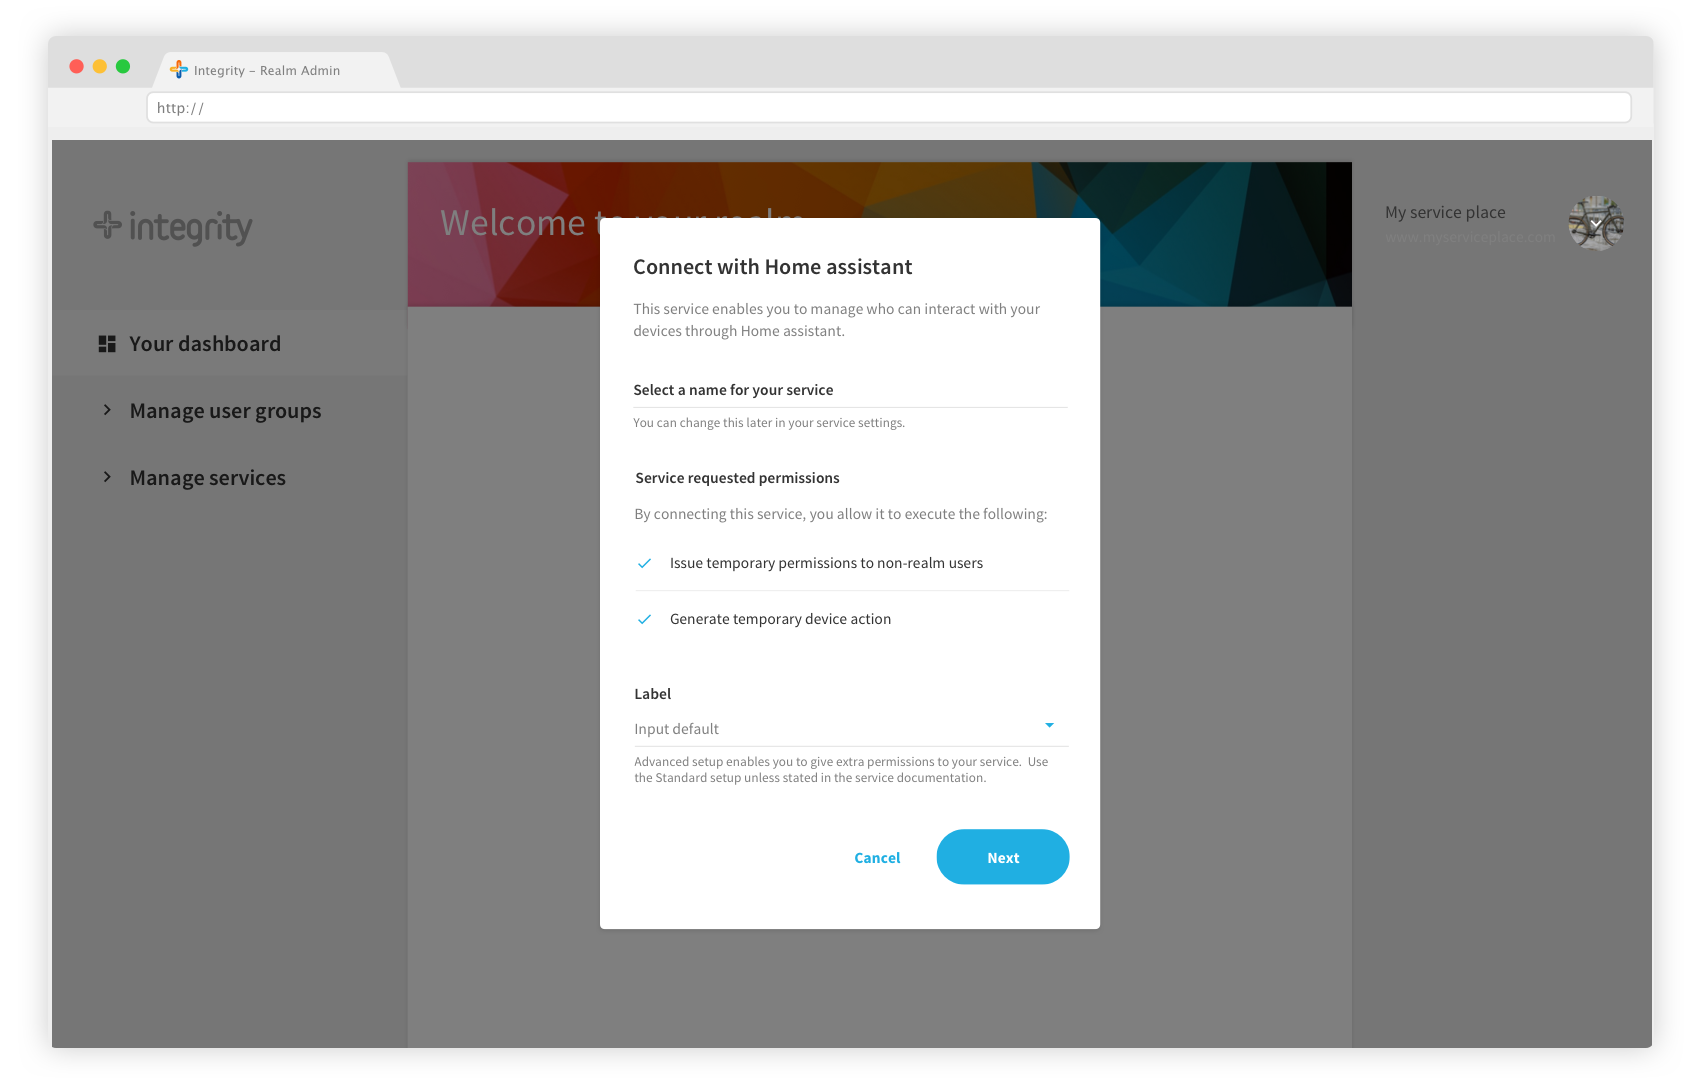
You will then be invited to bind the service to the realm, which means that you authorize the service to interact with your realm. You must do this because of our decentralized model. Choose the name of your service, for example “Home”, or “Office”. This is what you will see in your realm admin, it can be changed later. When you are ready, click Next.
Connect with your Home Assistant instance:
Use our tunneling proxy to configure your Home Assistant, which offers a secure method to connect the controller. Please follow these steps:
Add the Brickchain repository in your hass.io configuration.
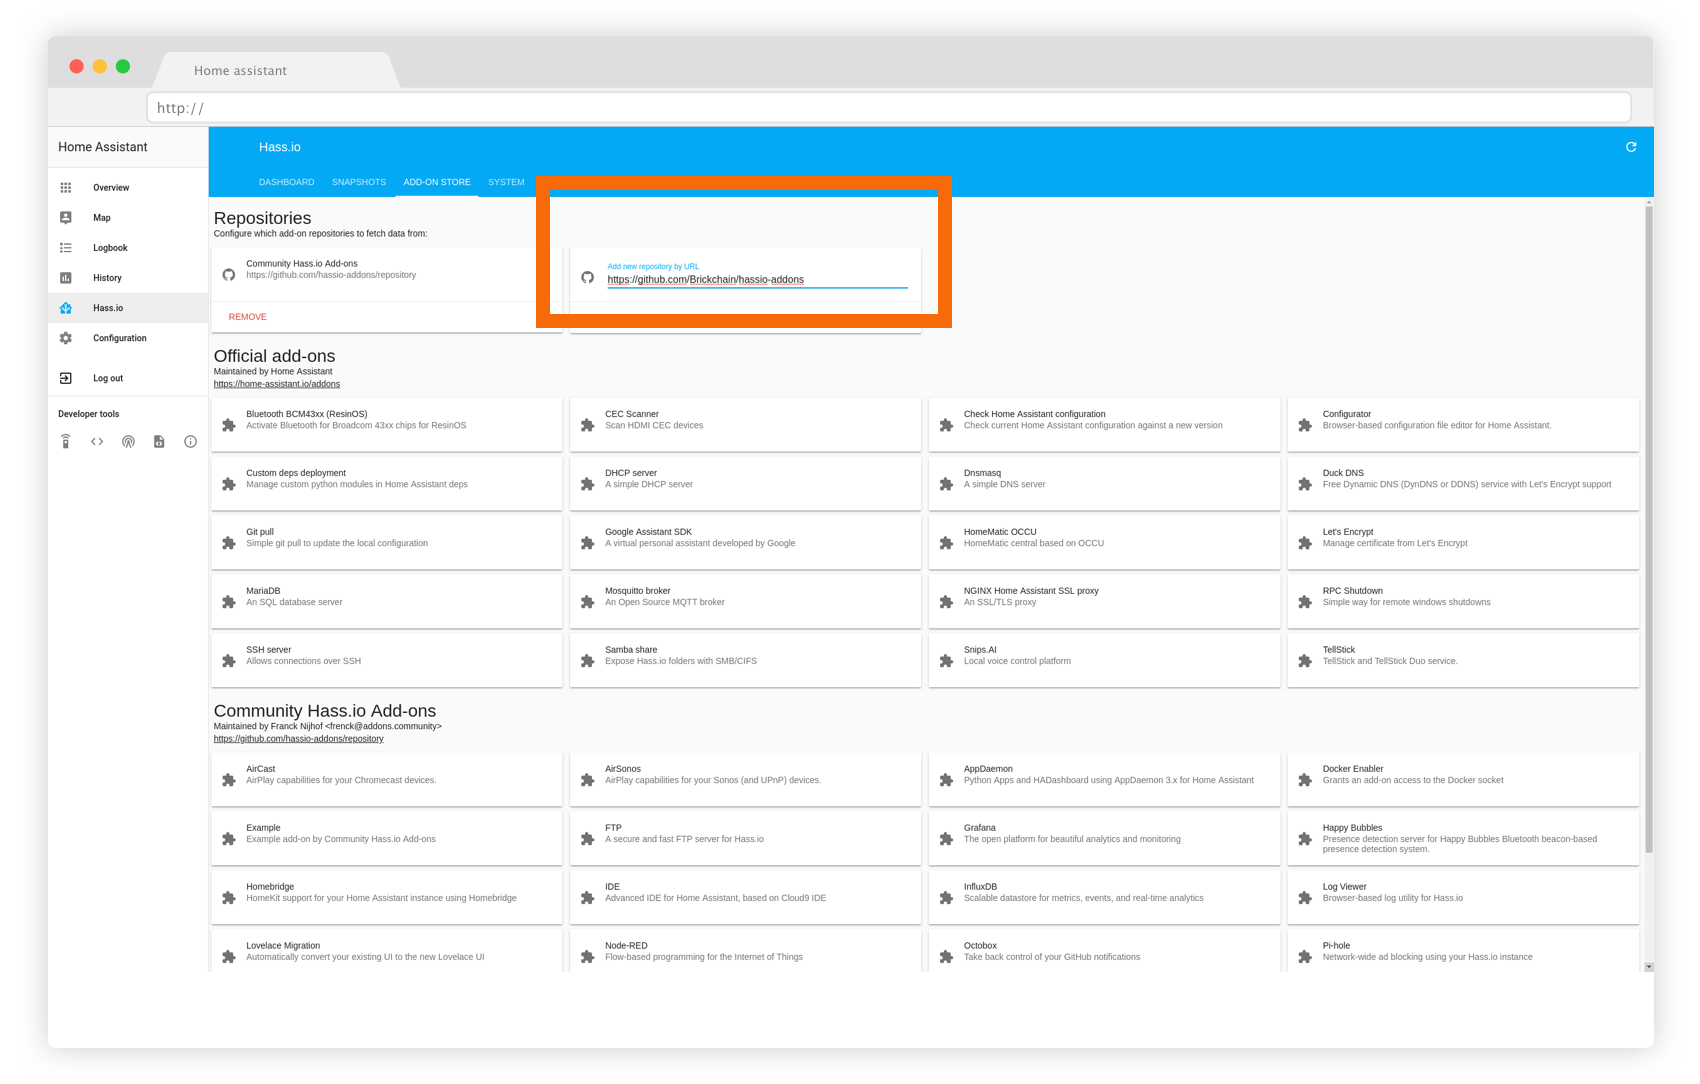
1- Add our addon repository to your installation. In your hass.io configuration, add this repository to your set of repositories: https://github.com/Brickchain/hassio-addons
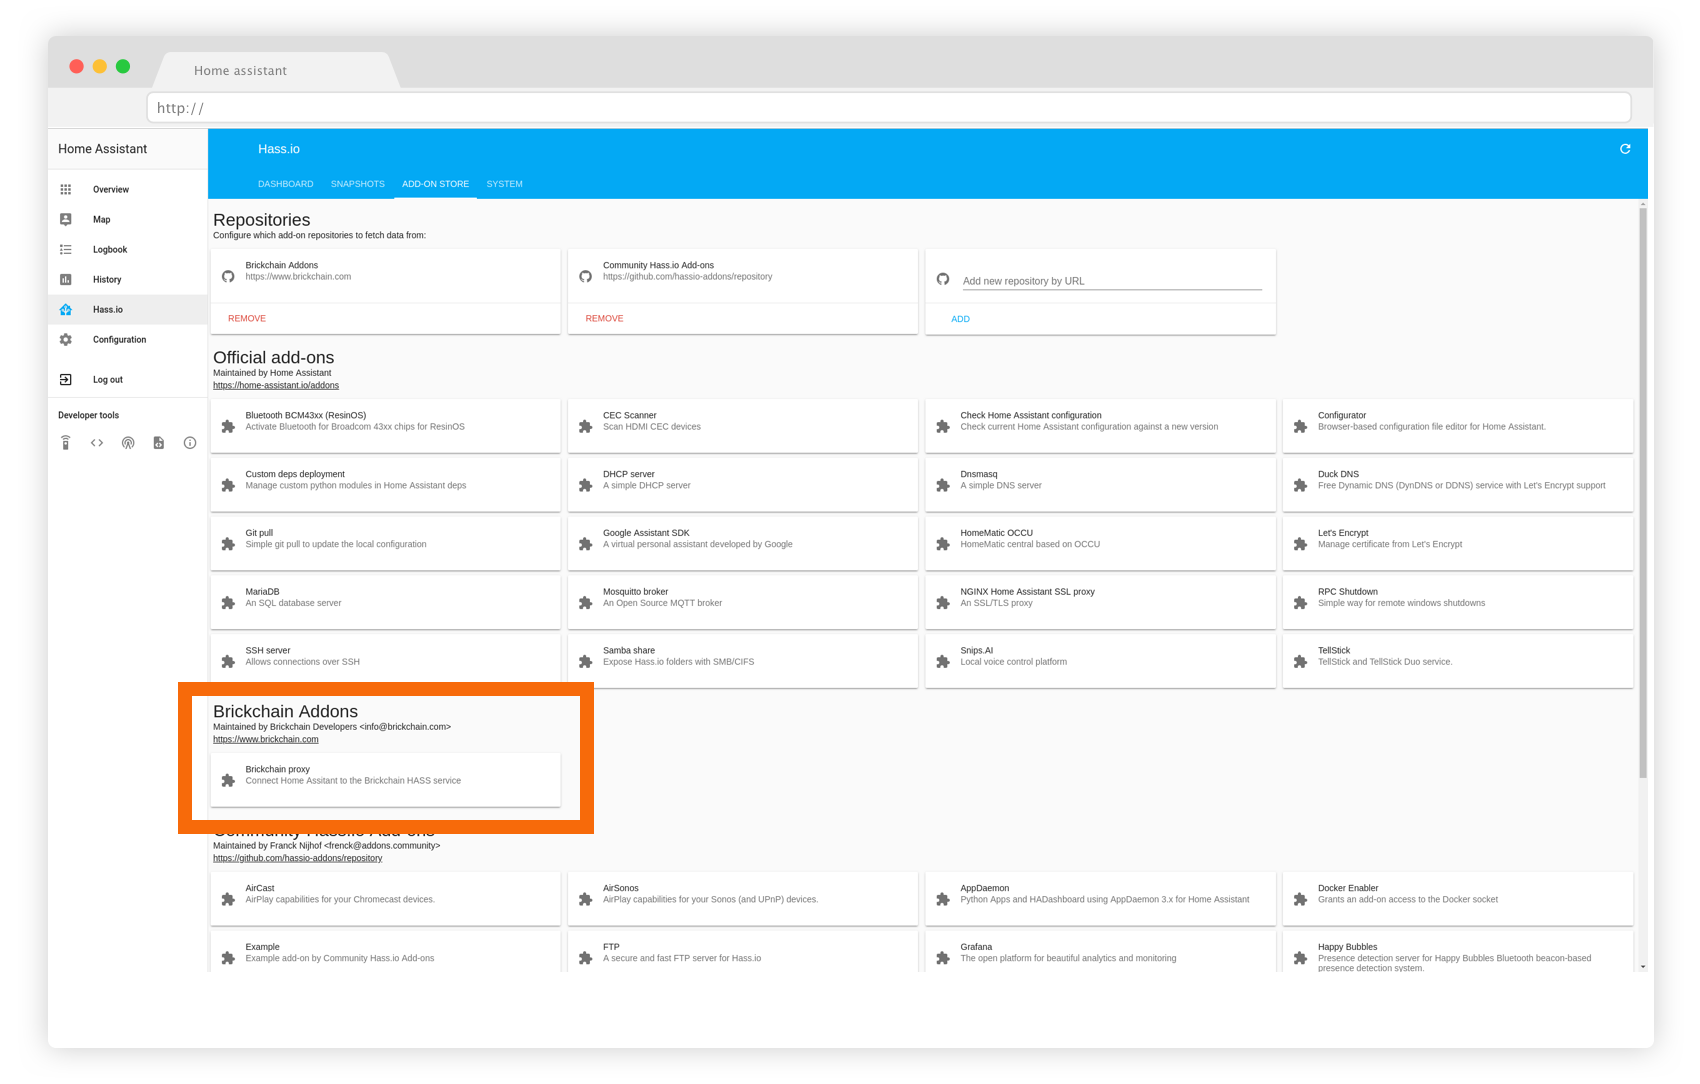
2- When the repository has been added, you should be able to install the Brickchain Proxy: click on it and press “install”.
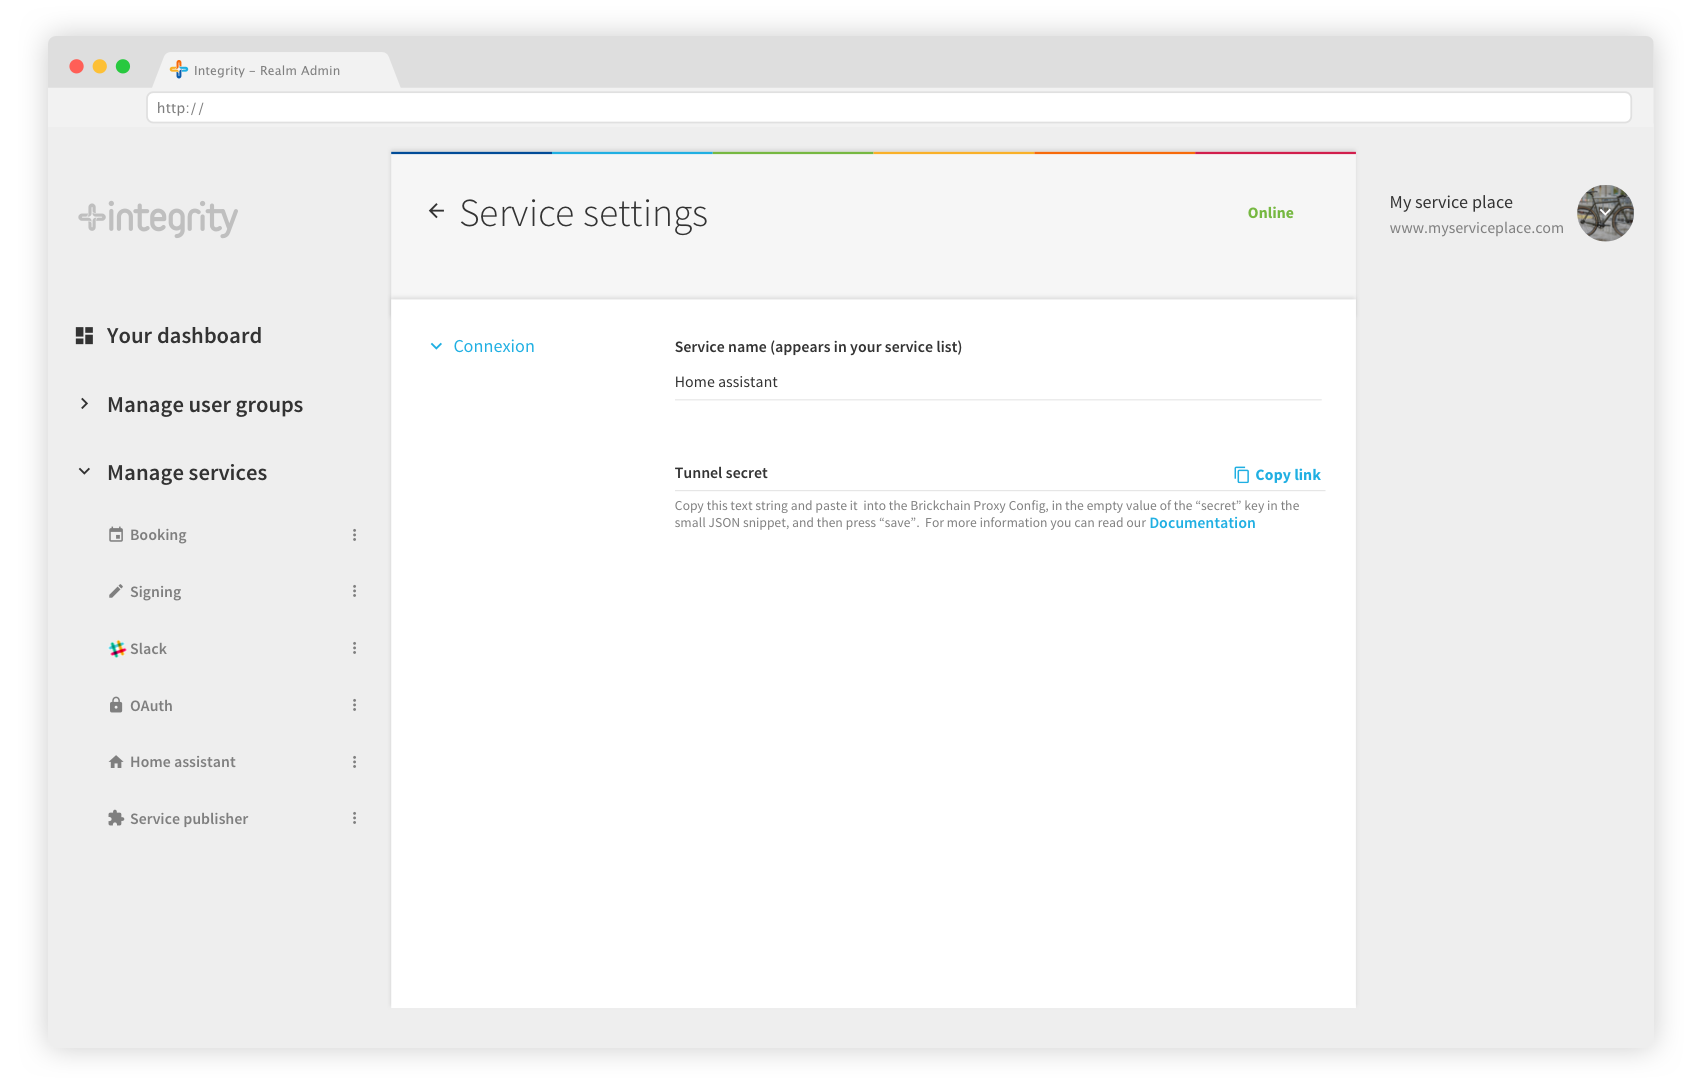
3- To configure the proxy, please get the Tunnel Secret in the Settings tab on your realm admin. Copy the value from the Tunnel Secret, and paste it into the Brickchain Proxy Config, in the empty value of the “secret” key in the small JSON snippet, and then press “save”.
Copy and paste the value of the tunnel secret in the proxy config, and press Save.
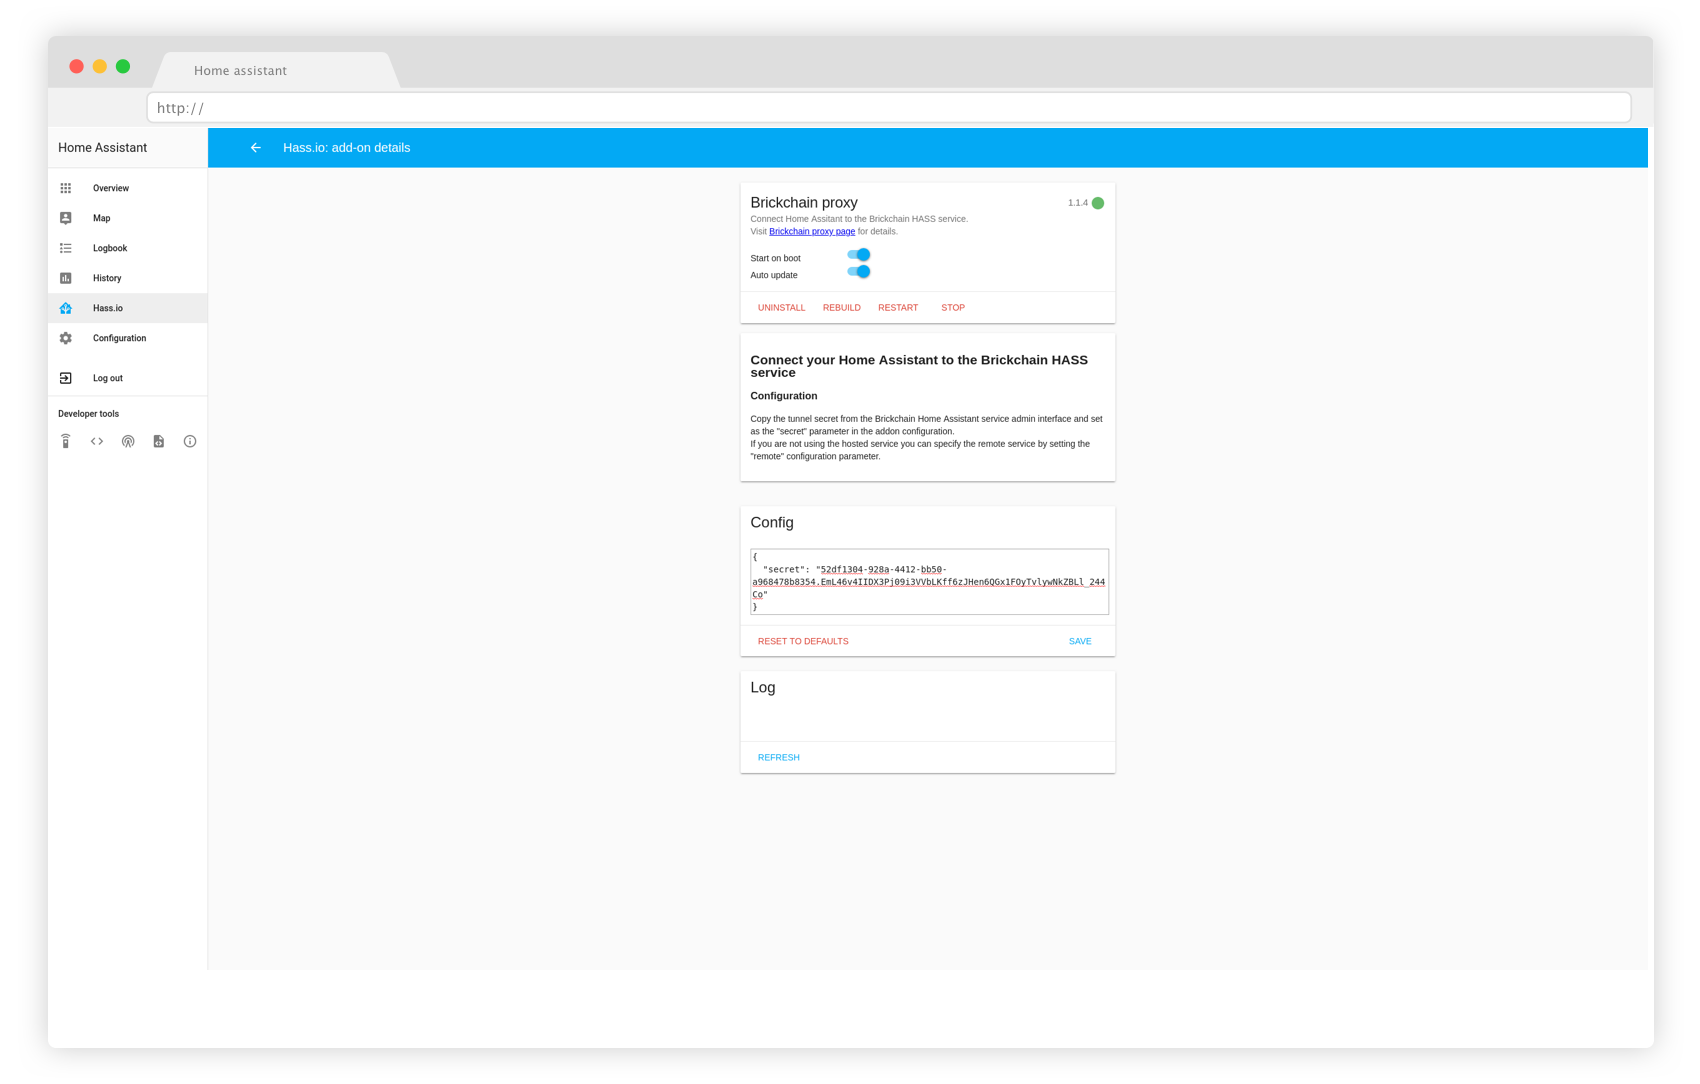
4- The controller should now indicate that Home Assistant is online. If it’s not, there is a Log in the Brickchain Proxy addon: that could indicate what is wrong.
Your service is now connected to your realm. Now is the time to add devices from Home Assistant and share them with other people.
Start sharing access and permissions to devices
You can now share lights, switches, locks, and we will add more devices in the near future. If you have any special need, please get in touch and ask us: hello@integrity.app
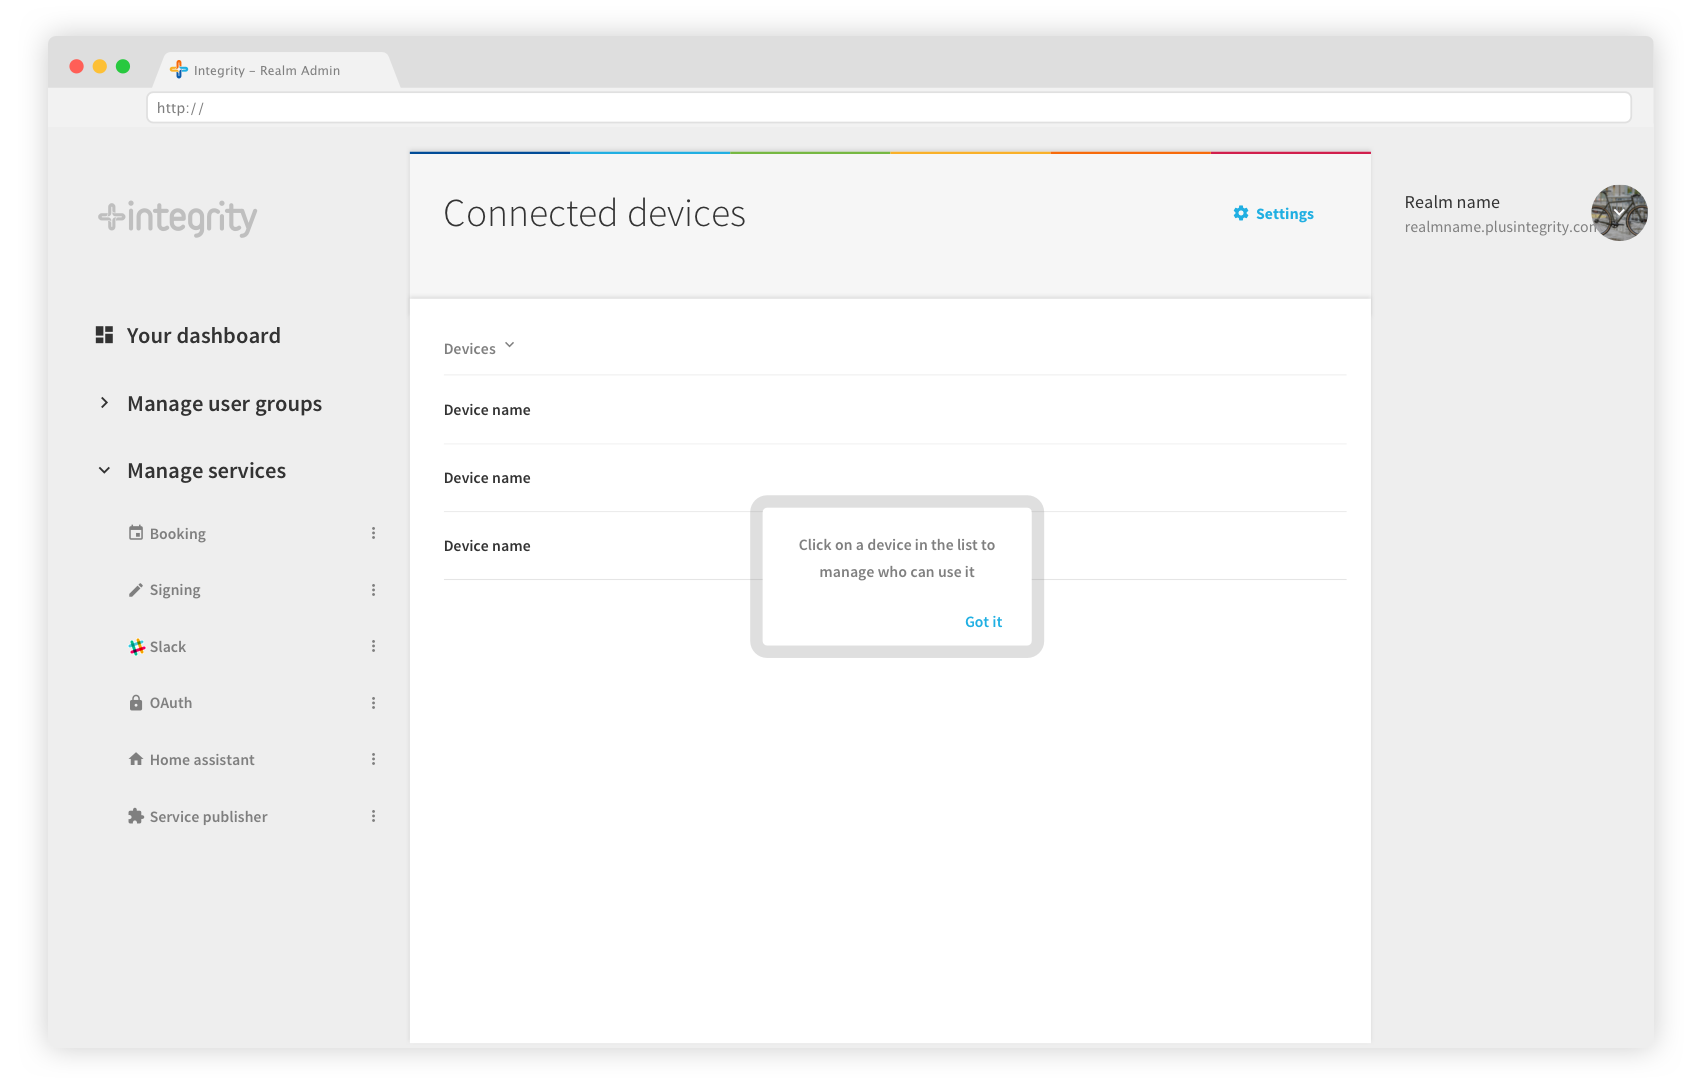
Once connected to your Home Assistant instance, the realm Admin displays all your devices as a list. By clicking on a device, you get redirected to the device page, where you can set permissions.
Select devices in the list, and define who can use them.
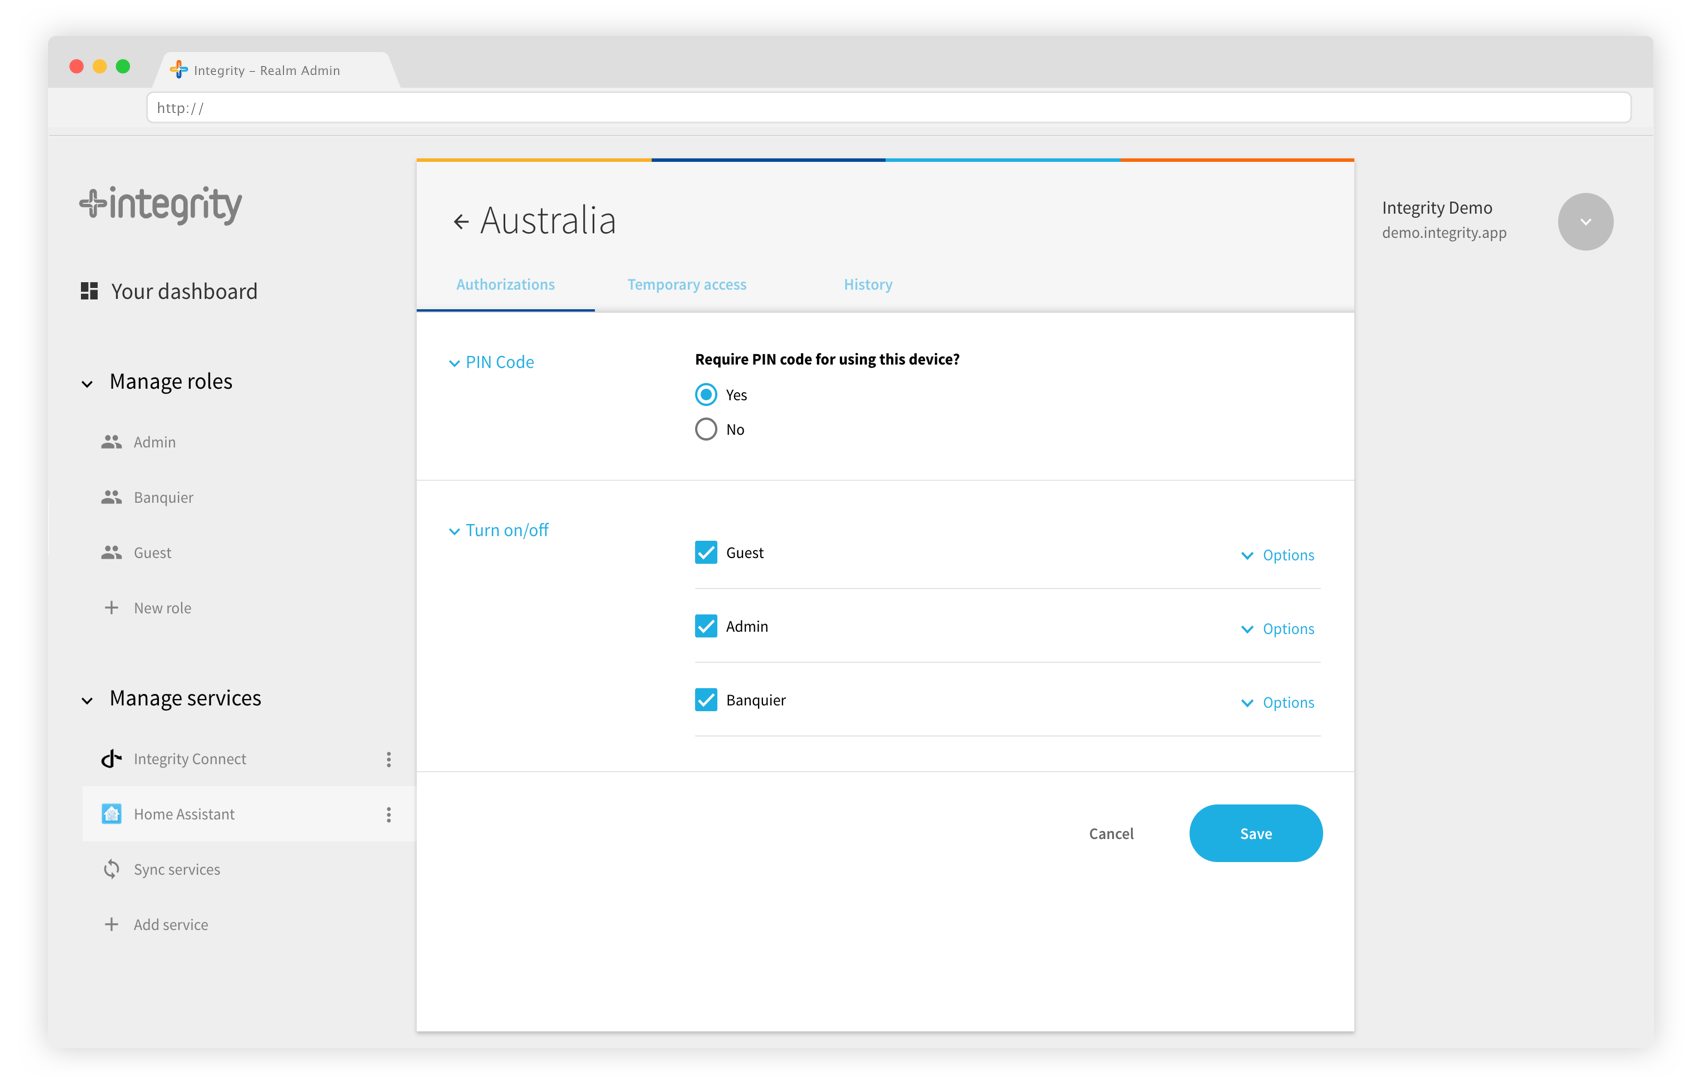
Permissions are assigned to user groups. Each action can be restricted to a certain user group. To understand better how user groups work, please refer to the Realm Admin guide.
To begin, let’s set permissions to yourself. By default, you are an Admin. Select an action, and check the box “Admin” in the list of user groups below. Press “Save”, that’s it! The device shall appear in your device list, and in the column “Groups”, you will see “Admin”. This simply means Admin users are allowed to use this device.
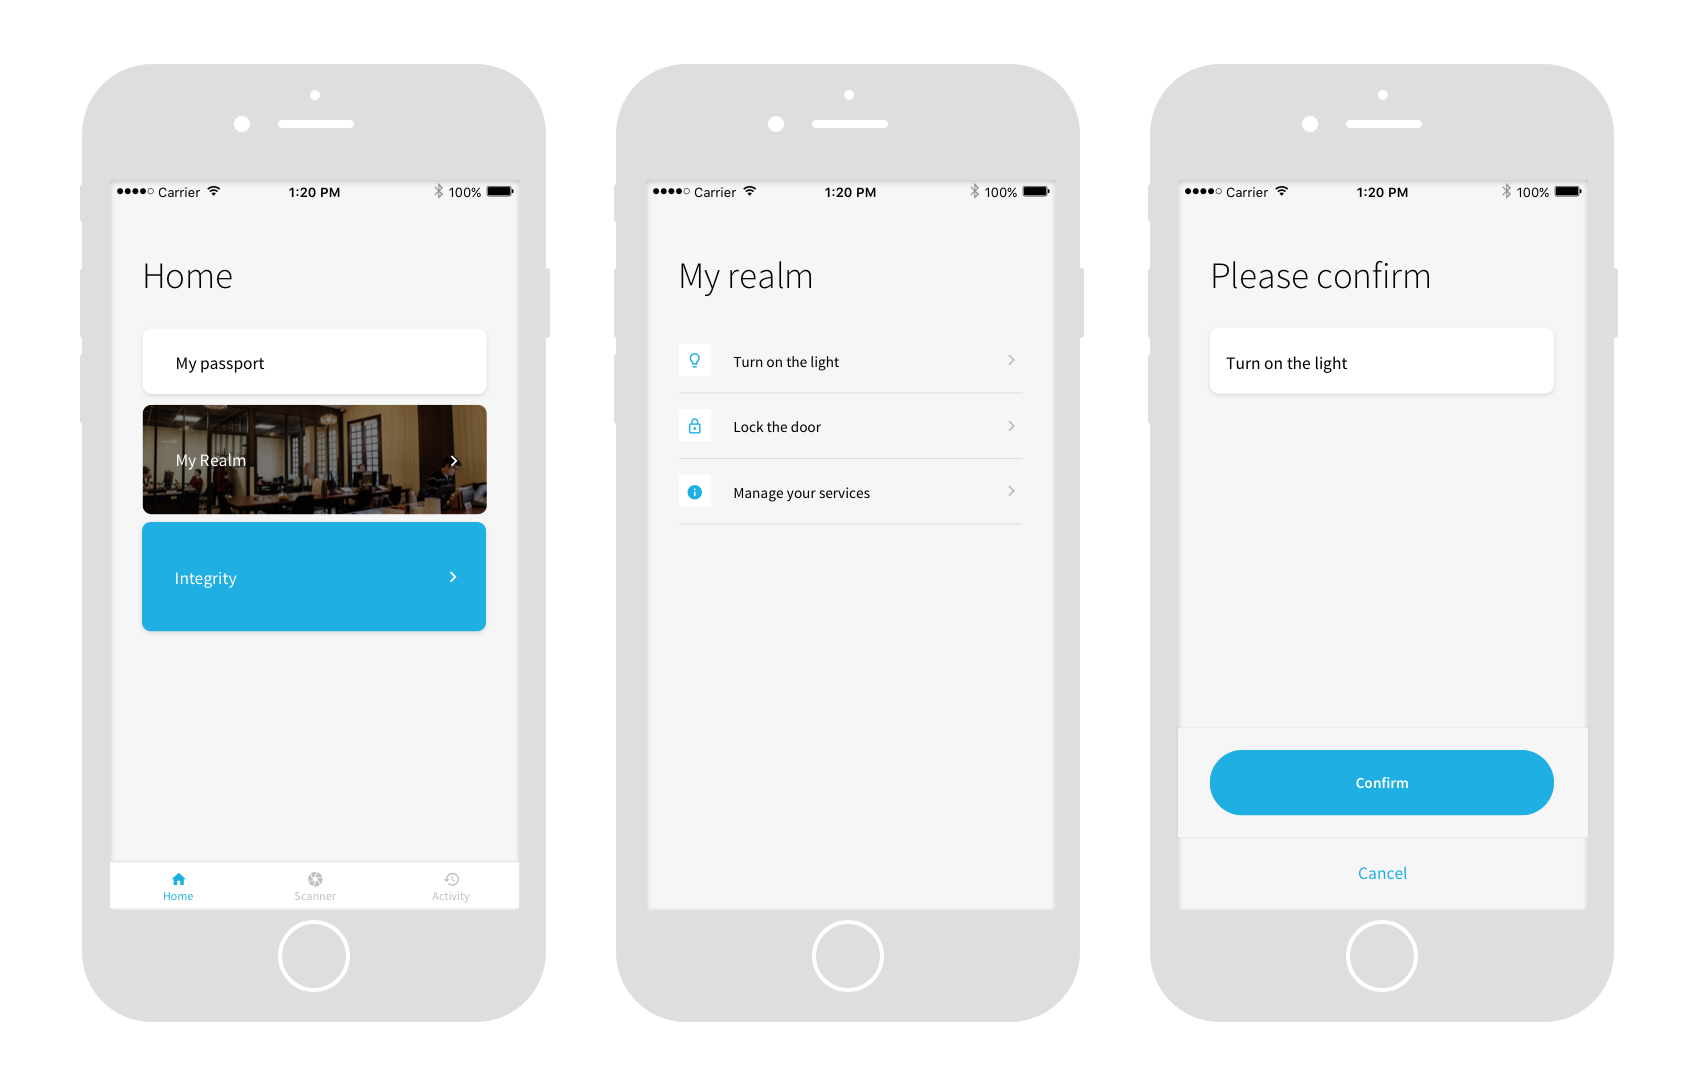
Now check your mobile Integrity App: on the Homepage, you can see your Realm. Click on it, and your device shall appear. Turn it on, turn it off, you’re all good!
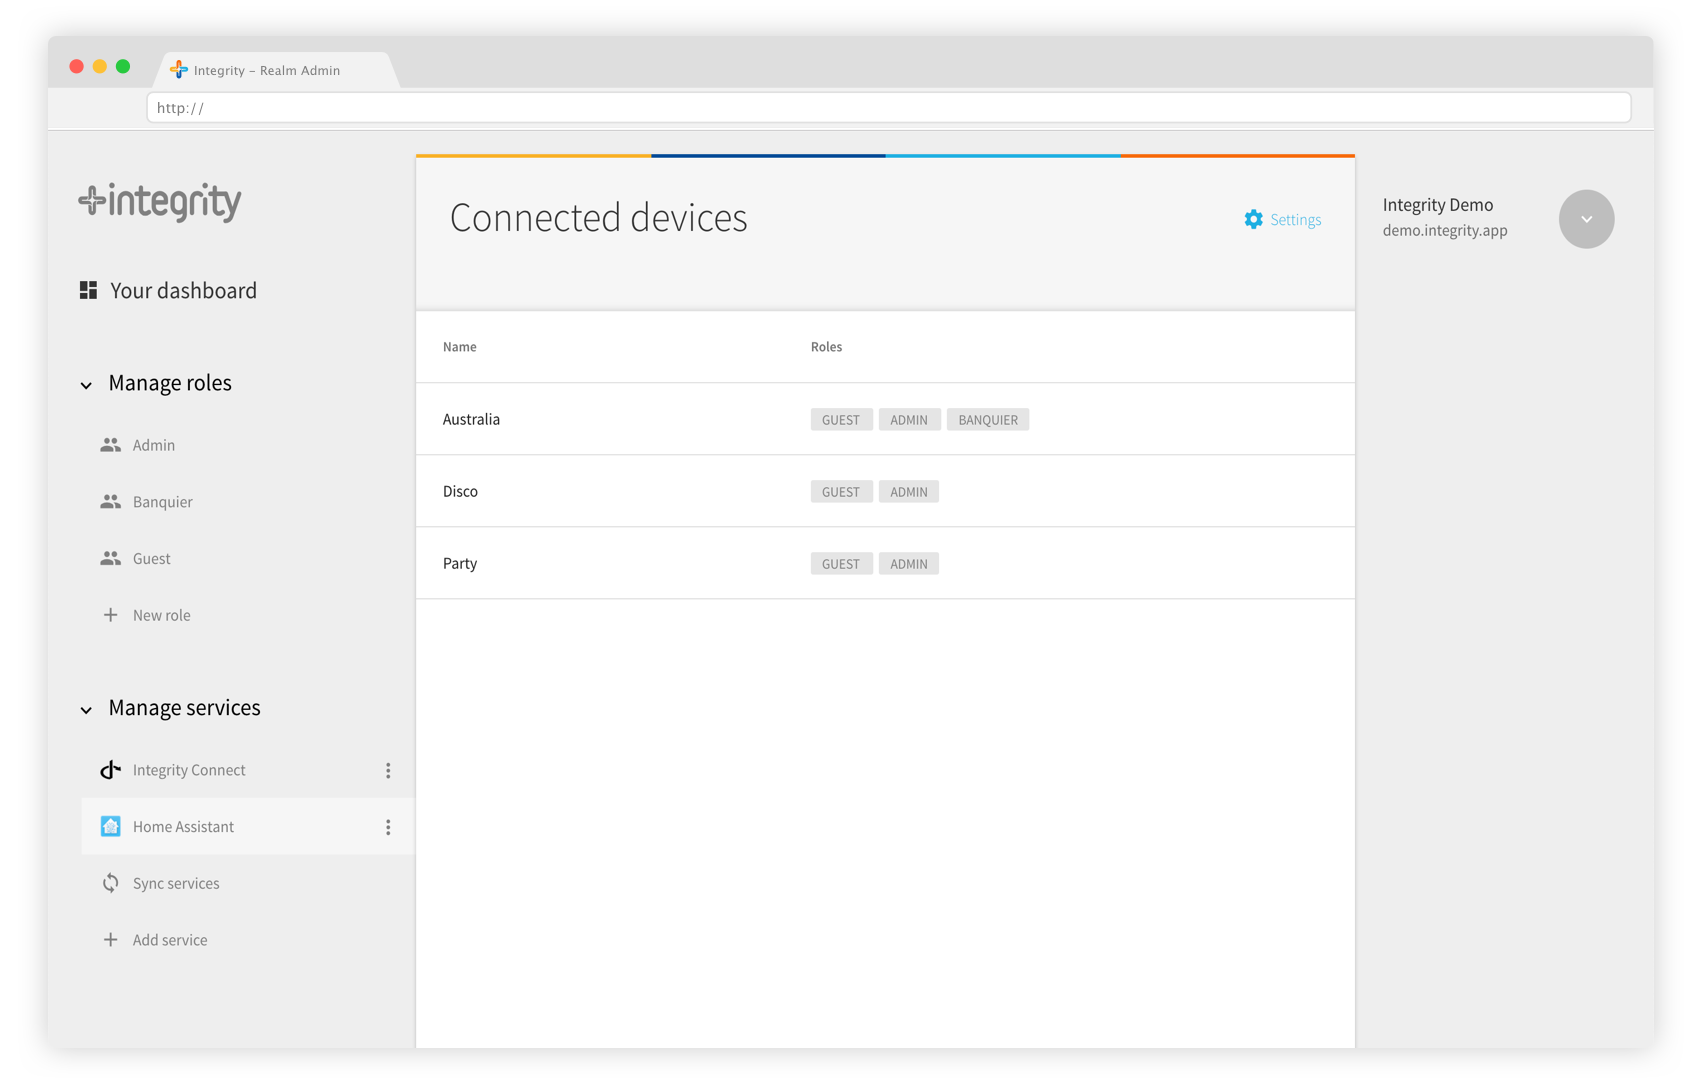
On your realm admin, the devices appear as a list with their related authorizations. On your application, you can see the actions you are allowed to perform.
Advanced options
Advanced scheduling
Imagine that you want to set an access for your cleaning service, which comes on Tuesday every week. With the advanced scheduler, it is possible to set a precise time for your permissions: on the device page, when defining which roles can access to a device, expand the option menu to reveal the advanced schedule options. You can define a start and an end, and schedule recurring events.
First, define the start and end dates for the permission. In our “cleaning service” example, select next Tuesday at 10:00 as a start, and next Tuesday at 12:00 as an end. Then tick the “Repeat” box to make this authorization a recurring event, and define the frequency (every week on Tuesday, until the end of your contract with the cleaning service, for example).
Use advanced scheduling to define precise time for your users to access your devices. Use temporary access to invite people to use your devices without creating new roles.

Temporary access
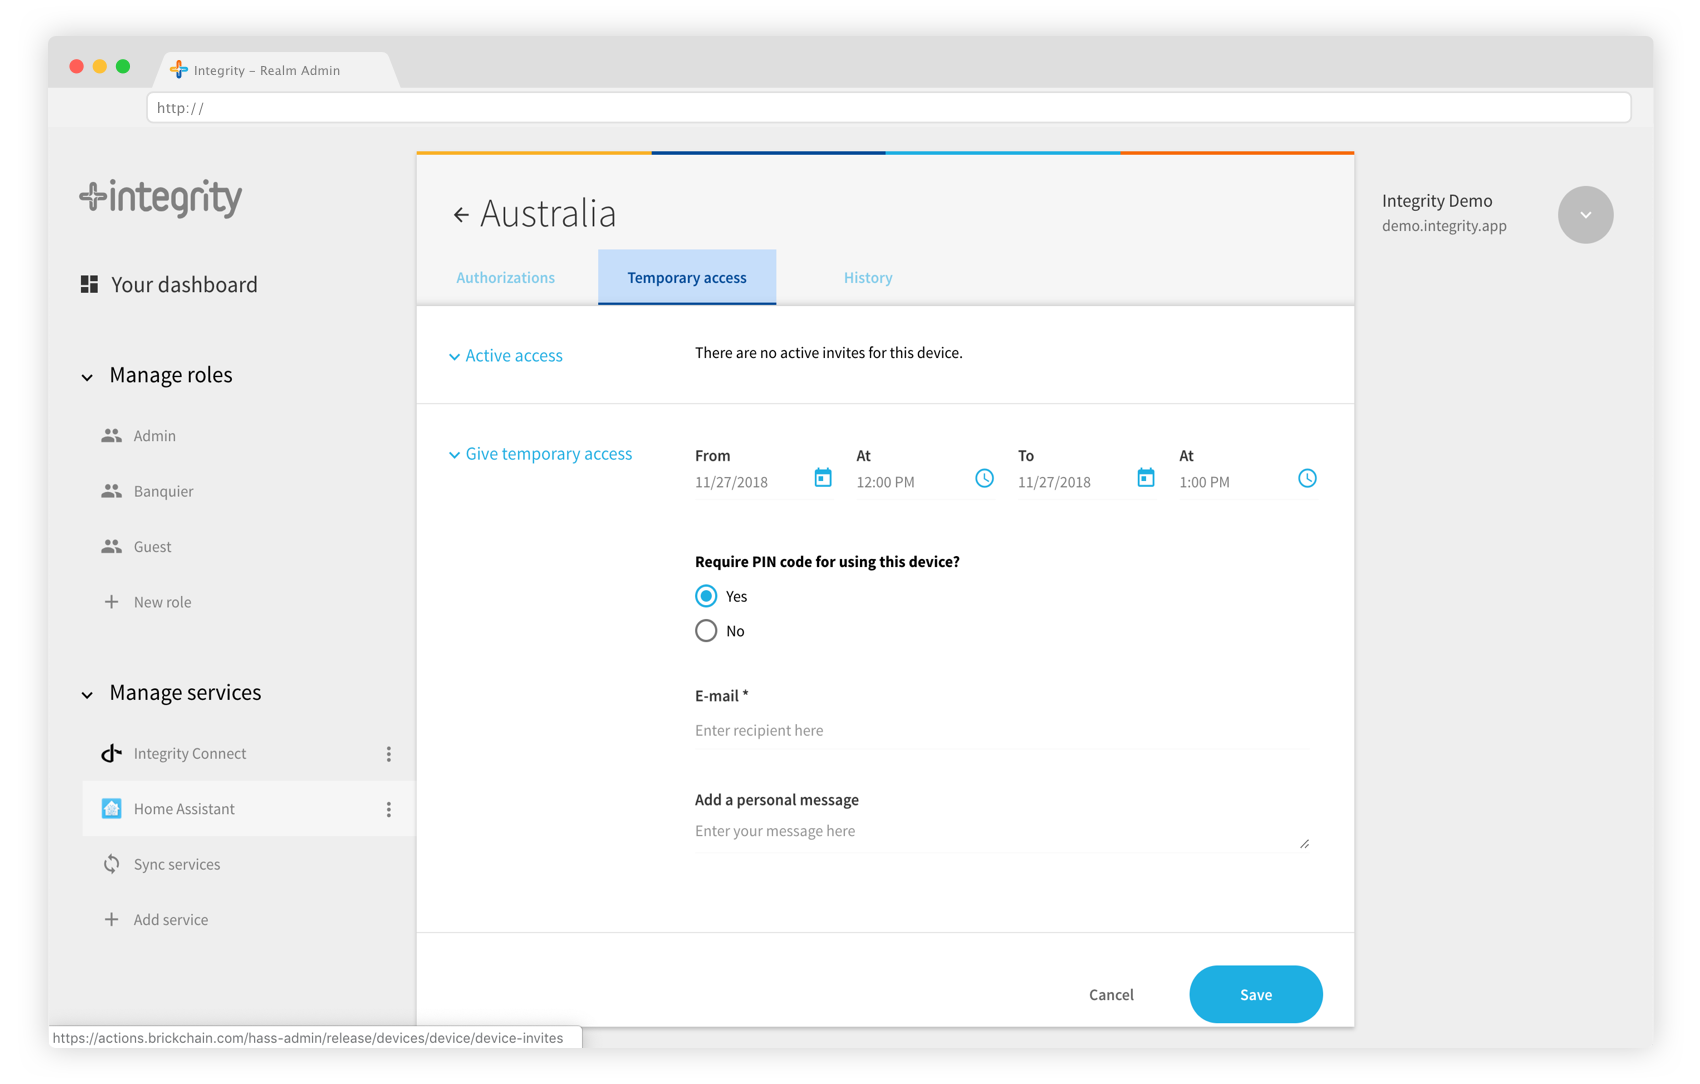
Temporary access enables you to give permissions on a device, without creating a role. The mandate is directly issued to the email of the person. This function can be useful to grant a one time access to your door to a delivery service, for example. To give temporary access to a person, select the “Temporary access” tab on top of the device page. By default, the temporary access is set to give access immediately to your device, and for an hour.
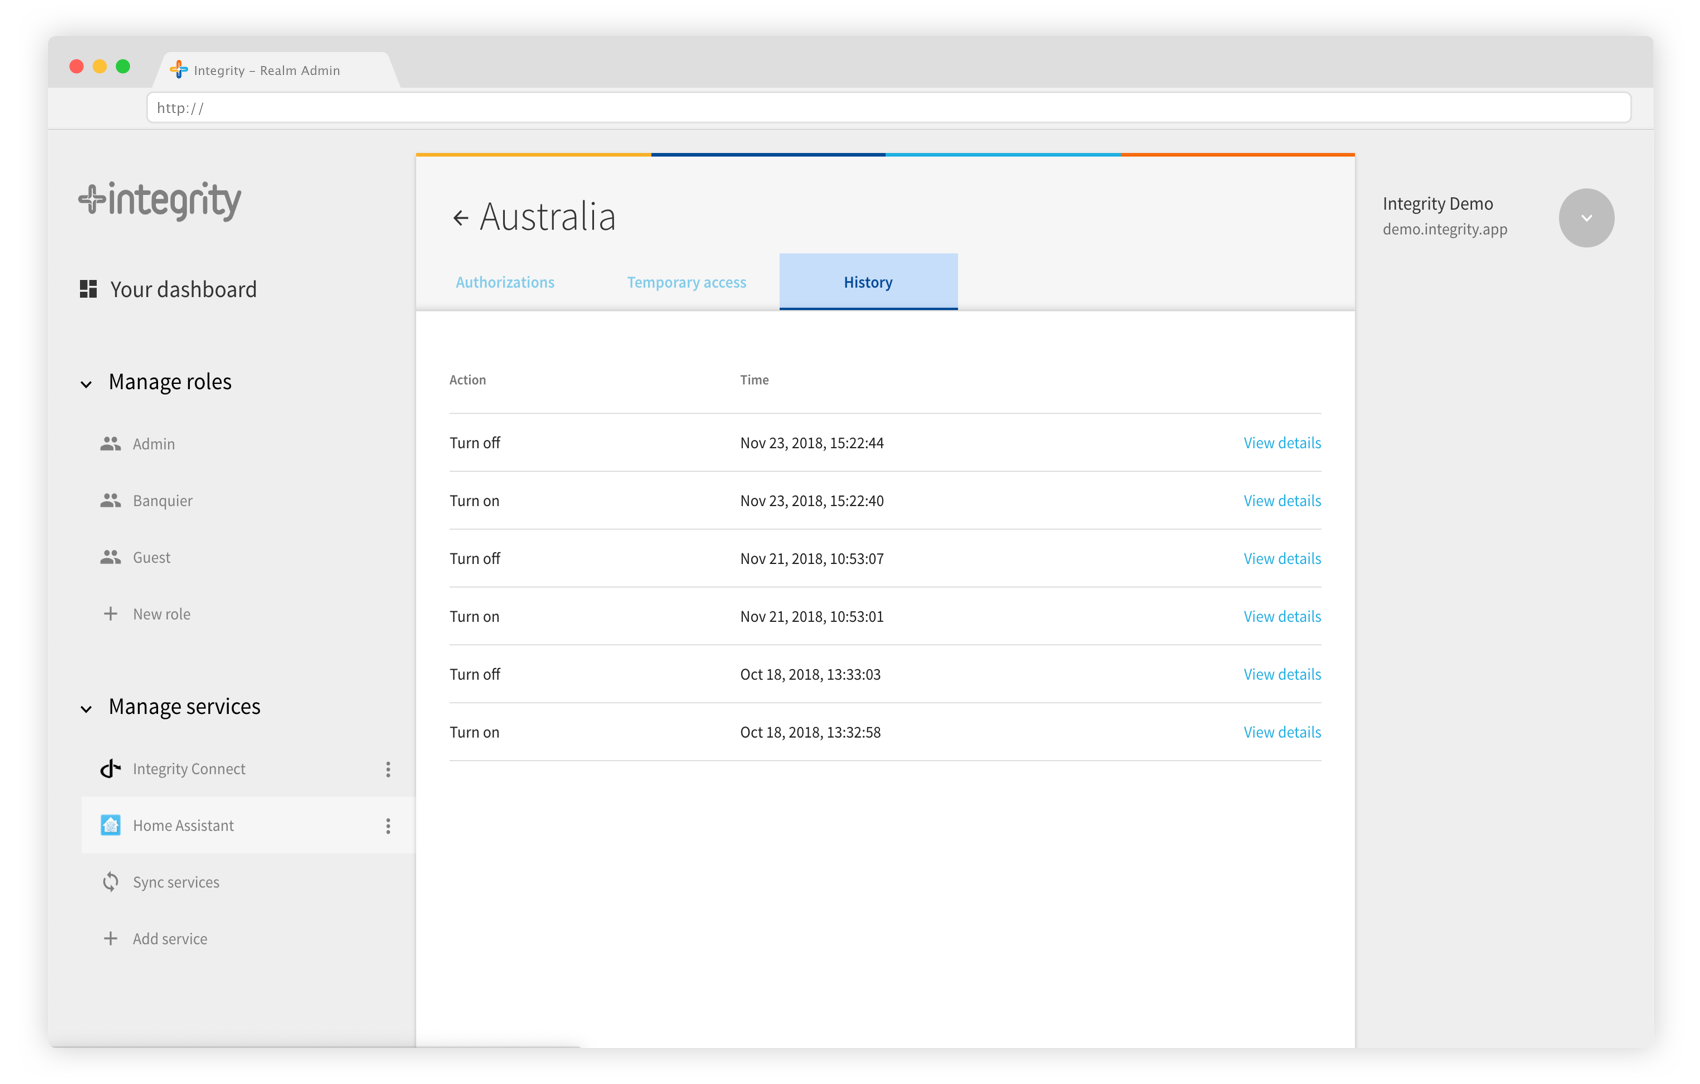
Device history
The device history tab enables you to check which mandates have been using your device.
Monitor who has been using your device.